Building a Netbox Docker instance and exploring its API
In this post, I’m going to walk you through the installation of the dockerized version of Netbox from the very beginning
until having a working instance, exploring its REST API using Insomnia (similar to Postman but with support for SOCKS
proxy), and finally using Python to make API calls.
Prerequisites
Before going any further, you need to make sure you have Docker Engine and Docker Compose installed.
For this tutorial, I’m going to use Ubuntu 20.04. If you don’t have them installed, please follow the steps indicated
here
https://docs.docker.com/engine/install/ubuntu/#installation-methods
.
Let’s confirm we have everything we need:
lab-server:~$ sudo docker run hello-world
Unable to find image 'hello-world:latest' locally
latest: Pulling from library/hello-world
2db29710123e: Pull complete
Digest: sha256:53f1bbee2f52c39e41682ee1d388285290c5c8a76cc92b42687eecf38e0af3f0
Status: Downloaded newer image for hello-world:latest

Hello from Docker!
This message shows that your installation appears to be working correctly.

To generate this message, Docker took the following steps:
 1. The Docker client contacted the Docker daemon.
 2. The Docker daemon pulled the "hello-world" image from the Docker Hub.
    (amd64)
 3. The Docker daemon created a new container from that image which runs the
    executable that produces the output you are currently reading.
 4. The Docker daemon streamed that output to the Docker client, which sent it
    to your terminal.

To try something more ambitious, you can run an Ubuntu container with:
 $ docker run -it ubuntu bash

Share images, automate workflows, and more with a free Docker ID:
 https://hub.docker.com/

For more examples and ideas, visit:
 https://docs.docker.com/get-started/

lab-server:~$ docker compose version
Docker Compose version v2.6.0
Building a Netbox Docker instance
Thanks to the fantastic job the maintainers of Netbox Docker have done, the installation is really easy. We just need to
follow the steps
here,
which come down to, copying the below in
our console1:
git clone -b release https://github.com/netbox-community/netbox-docker.git
cd netbox-docker
tee docker compose.override.yml <<EOF
version: '3.4'
services:
netbox:
ports:
- 8000:8080
EOFsudo docker compose pull
sudo docker compose up -d
What the above does is:
Clone the git repository for Netbox Docker in our local directory.
Create a docker-compose YAML file.
Spin up all the Netbox docker containers (database, cache, GUI…).
And after a couple of minutes, we should be able to reach the GUI too. However, before going any further, it’d be good
to verify our installation by running NetBox’s unit tests to ensure that the installation finished correctly.
We run the below script2 within the same folder we run the previous commands - keep in mind that it’ll take a few
minutes to finish:
Nice, now we have a fully capable dockerized Netbox testing instance. The default creds shipped with it are:
Username: admin
Password: admin
API Token: 0123456789abcdef0123456789abcdef01234567
Next, let’s confirm that we can log in:
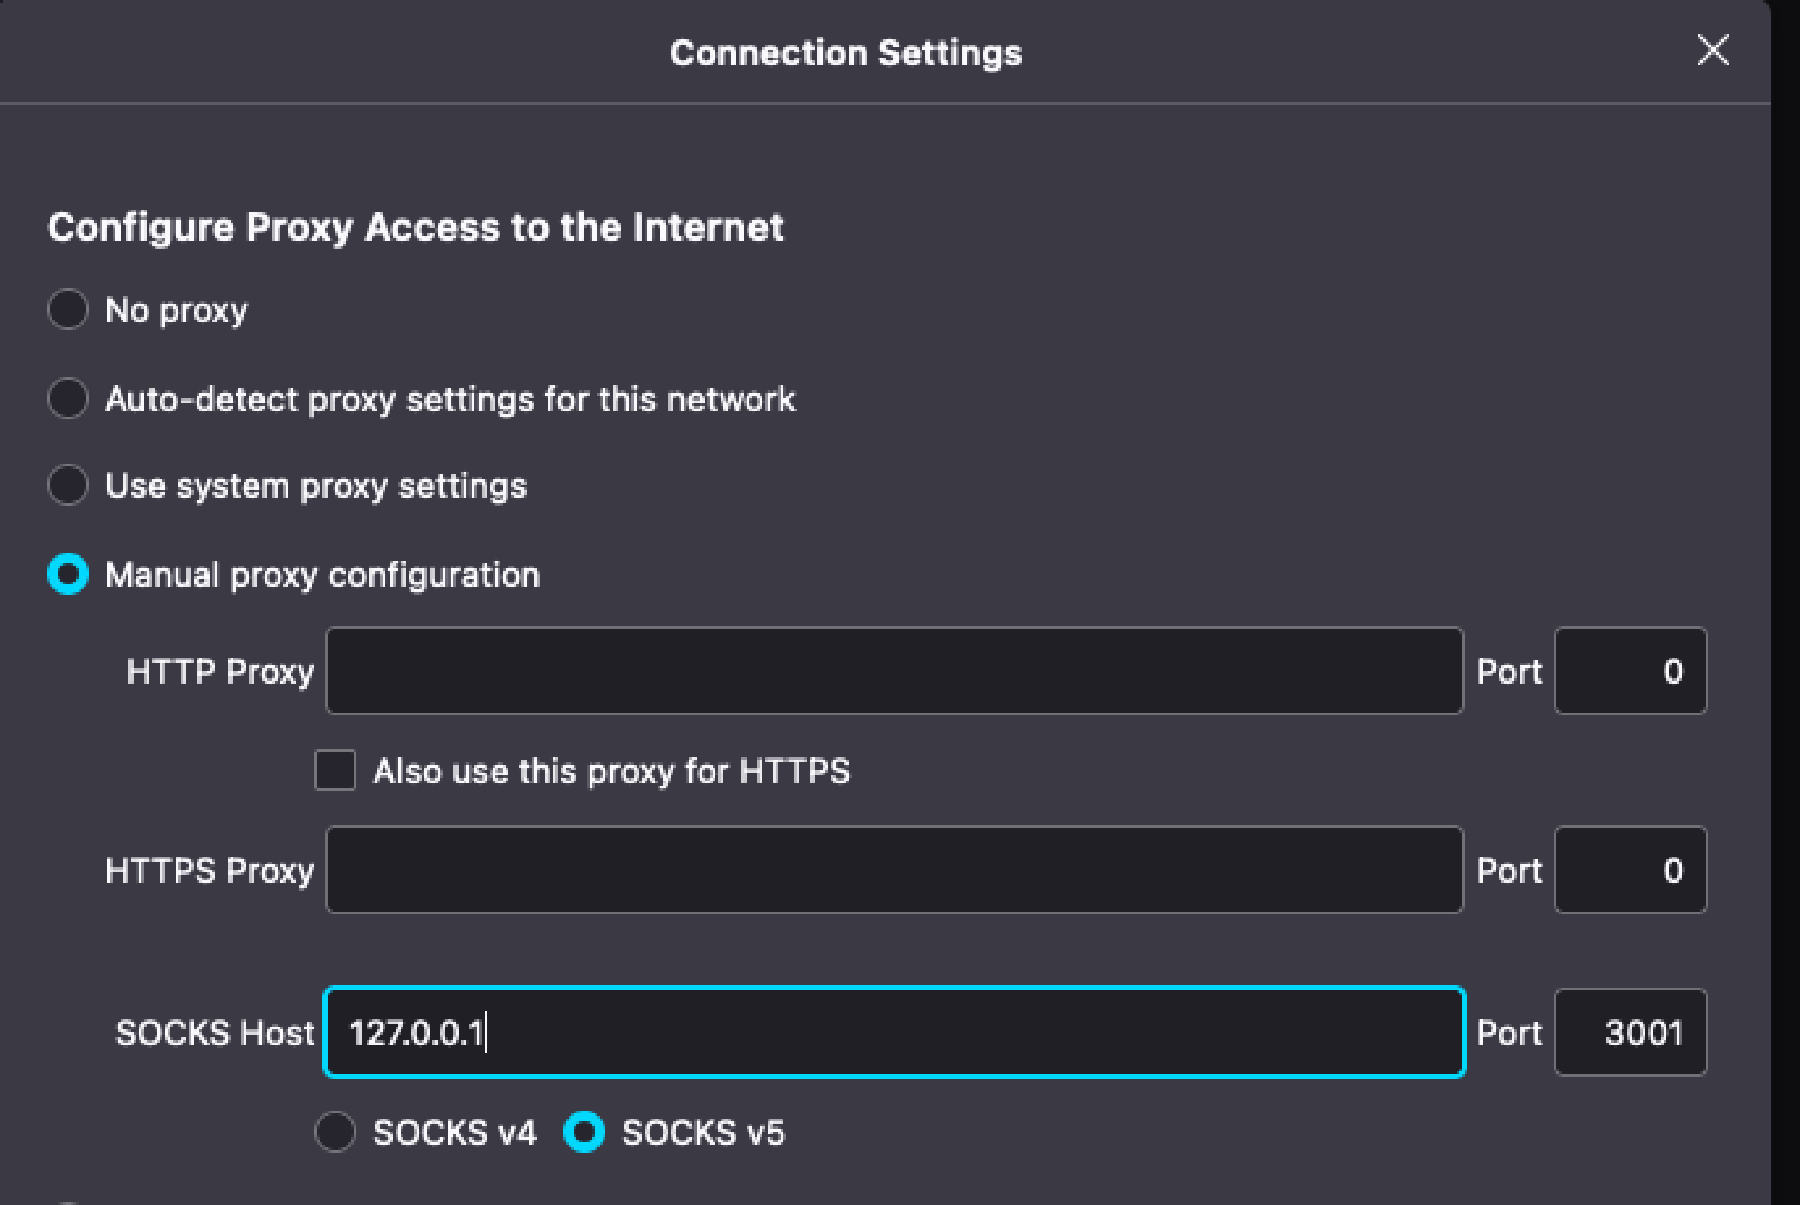
If you’re running this container in a remote server, like I am, you can access the GUI by configuring a SOCKS proxy
using your web browser and connecting to your remote server using SSH with the application-level port forwarding argument.
Firefox SOCKSv5 config:
SSH application-level port forwarding:
ssh -D 3001 lab@192.168.1.120
Note: 3001 is a random port, you can use any other.
NetBox Device Type Library and Netbox Device Type Library Import
Before we start exploring the Netbox API. Let’s take a look at the
Device Type Library.
By default, Netbox ships with no device types - as can be seen in the previous Netbox home screenshot.
This library provides us with many device types and components ready to import into our Netbox instance so that we
don’t have to define them manually.
You can find a full list of supported devices
here.
Whilst this library is very useful as we no longer need to create a YAML file defining the number of interfaces our device
has, interface names,…we still need to import the devices manually into Netbox. Here’s where the
Device-Type-Library-Import
project comes in handy.
This is a script that allows us to import all the devices from the official Netbox Device Type Library programmatically -
it also allows for some customisation such as importing specific vendors only. Time to use it then!
Clone the git repo, create a Python venv and install the required libraries:
tee .env <<EOF
NETBOX_URL=http://0.0.0.0:8000/
NETBOX_TOKEN=0123456789abcdef0123456789abcdef01234567
REPO_URL=https://github.com/netbox-community/devicetype-library.git
REPO_BRANCH=master
IGNORE_SSL_ERRORS=True
EOF
Run the script to create all vendors and device types, keep in mind this will take around 20 mins, alternatively you
can specify the vendor by using the “–vendors” argument, for instance “–vendors juniper”.
./nb-dt-import.py
Once the script is done, you should see something like this:
(venv) lab-server:~$ ./nb-dt-import.py
Package Installed https://github.com/netbox-community/devicetype-library.git
No Vendors Specified, Gathering All Device-Types
82 Vendors Found
1778 Device-Types Found
...output trimmed...
---
Script took 0:19:48.428980 to run
1760 devices created
43218 interfaces/ports updated
82 manufacturers created
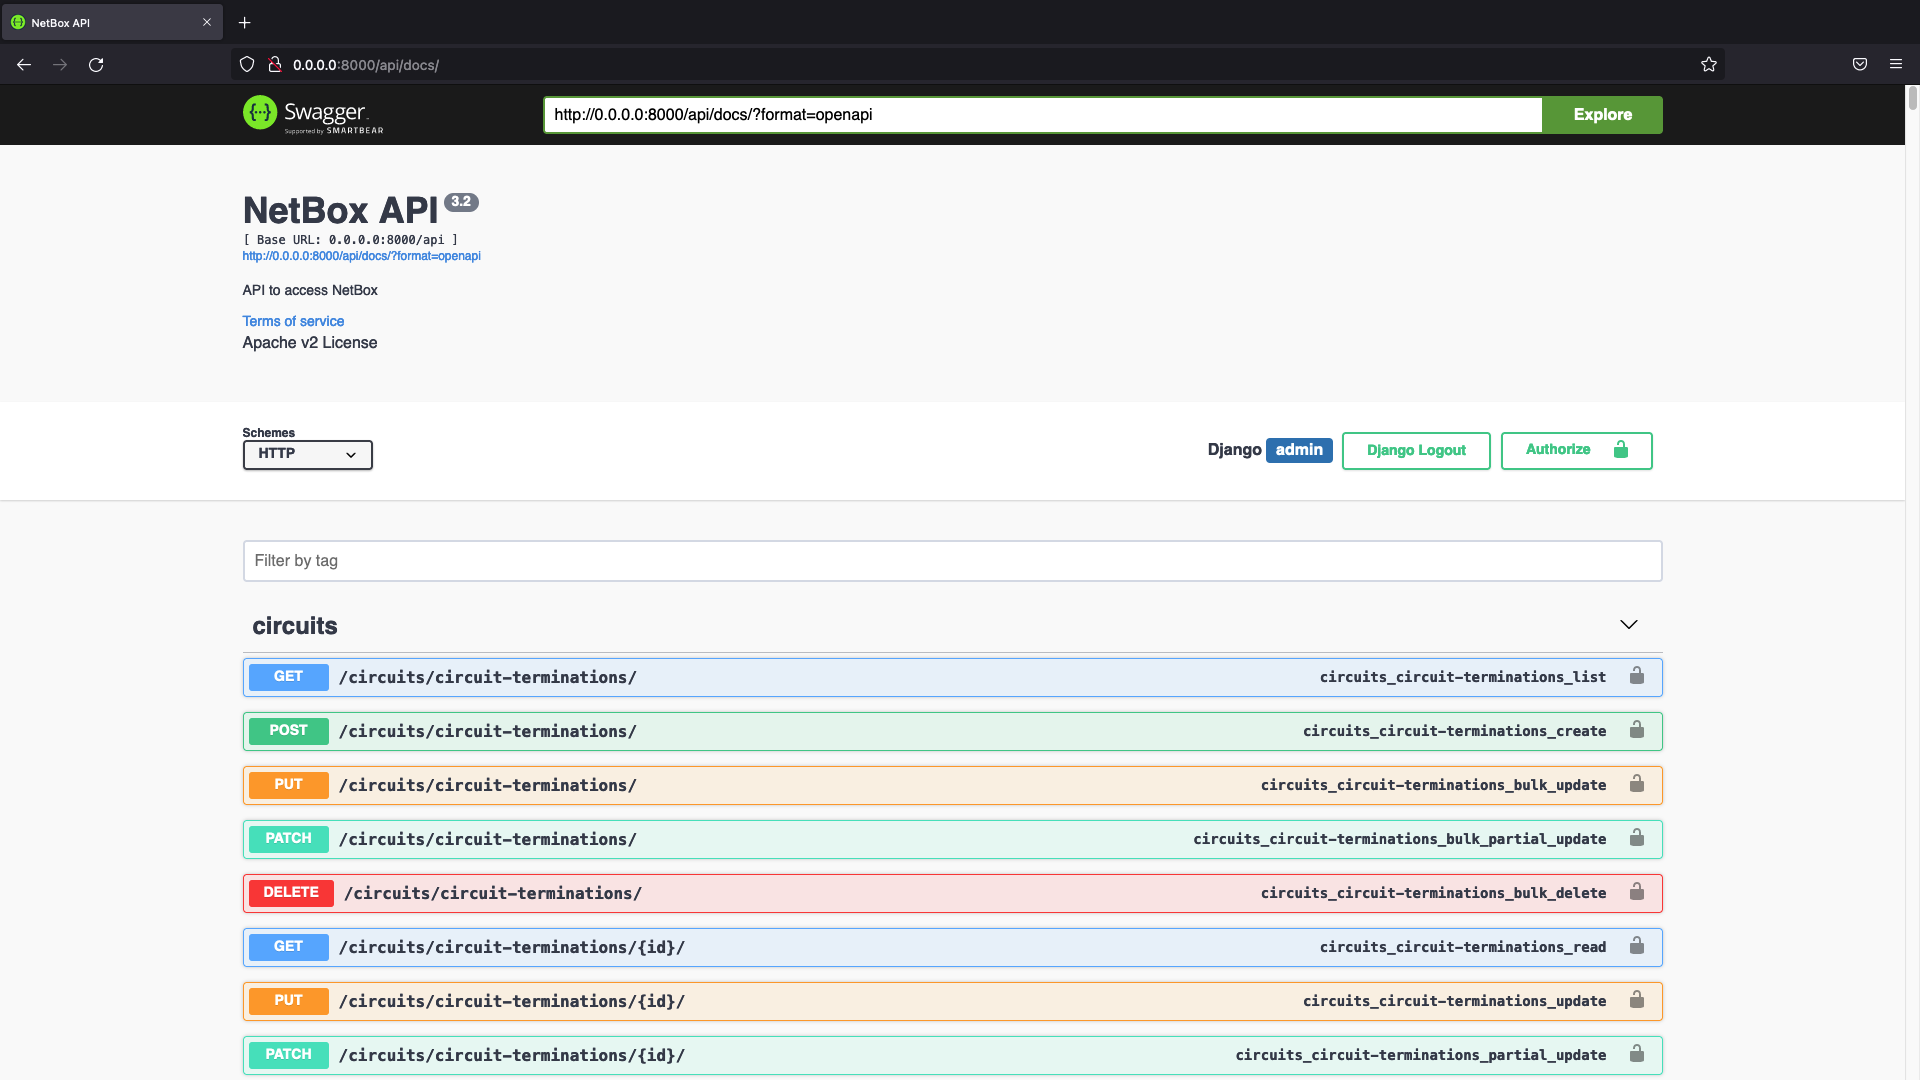
Exploring the Netbox REST API
To access the API documentation we go to
http://0.0.0.0:8000/api/docs.
Here, we find all the paths available and what type of data we get from each one of them.
This documentation is of utmost importance, without it we don’t know which paths we need to use to query what data. The
path needs to be appended like this
http://0.0.0.0:8000/api/{path}.
to form the full URL we’ll need to use when
making our API calls.
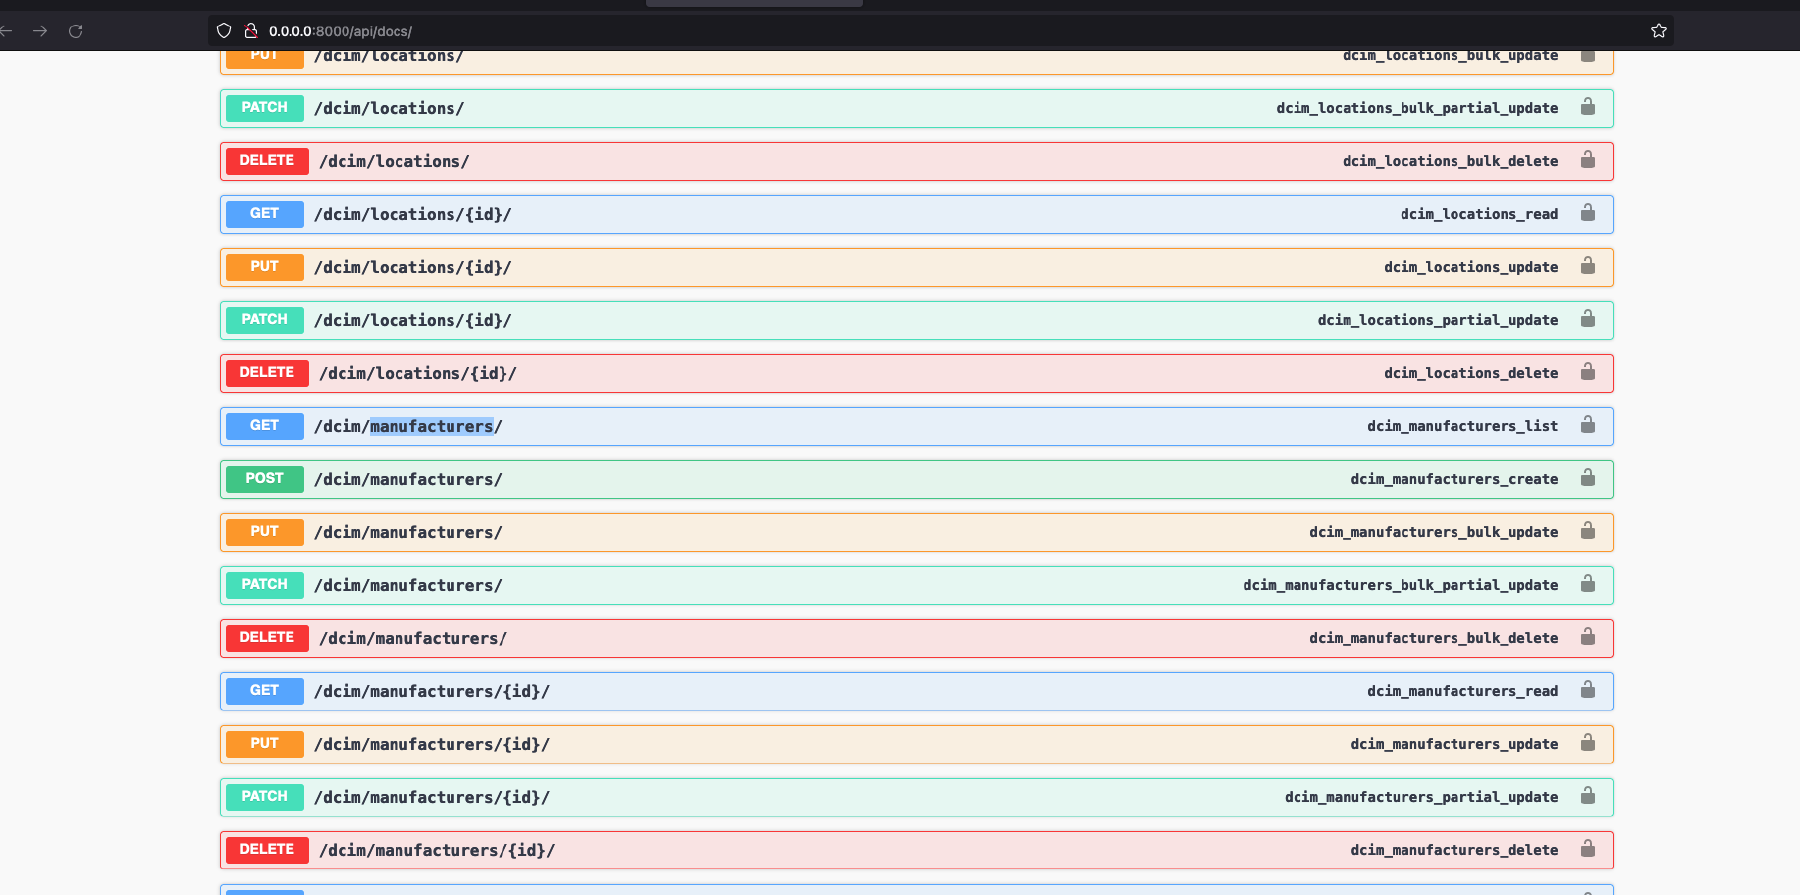
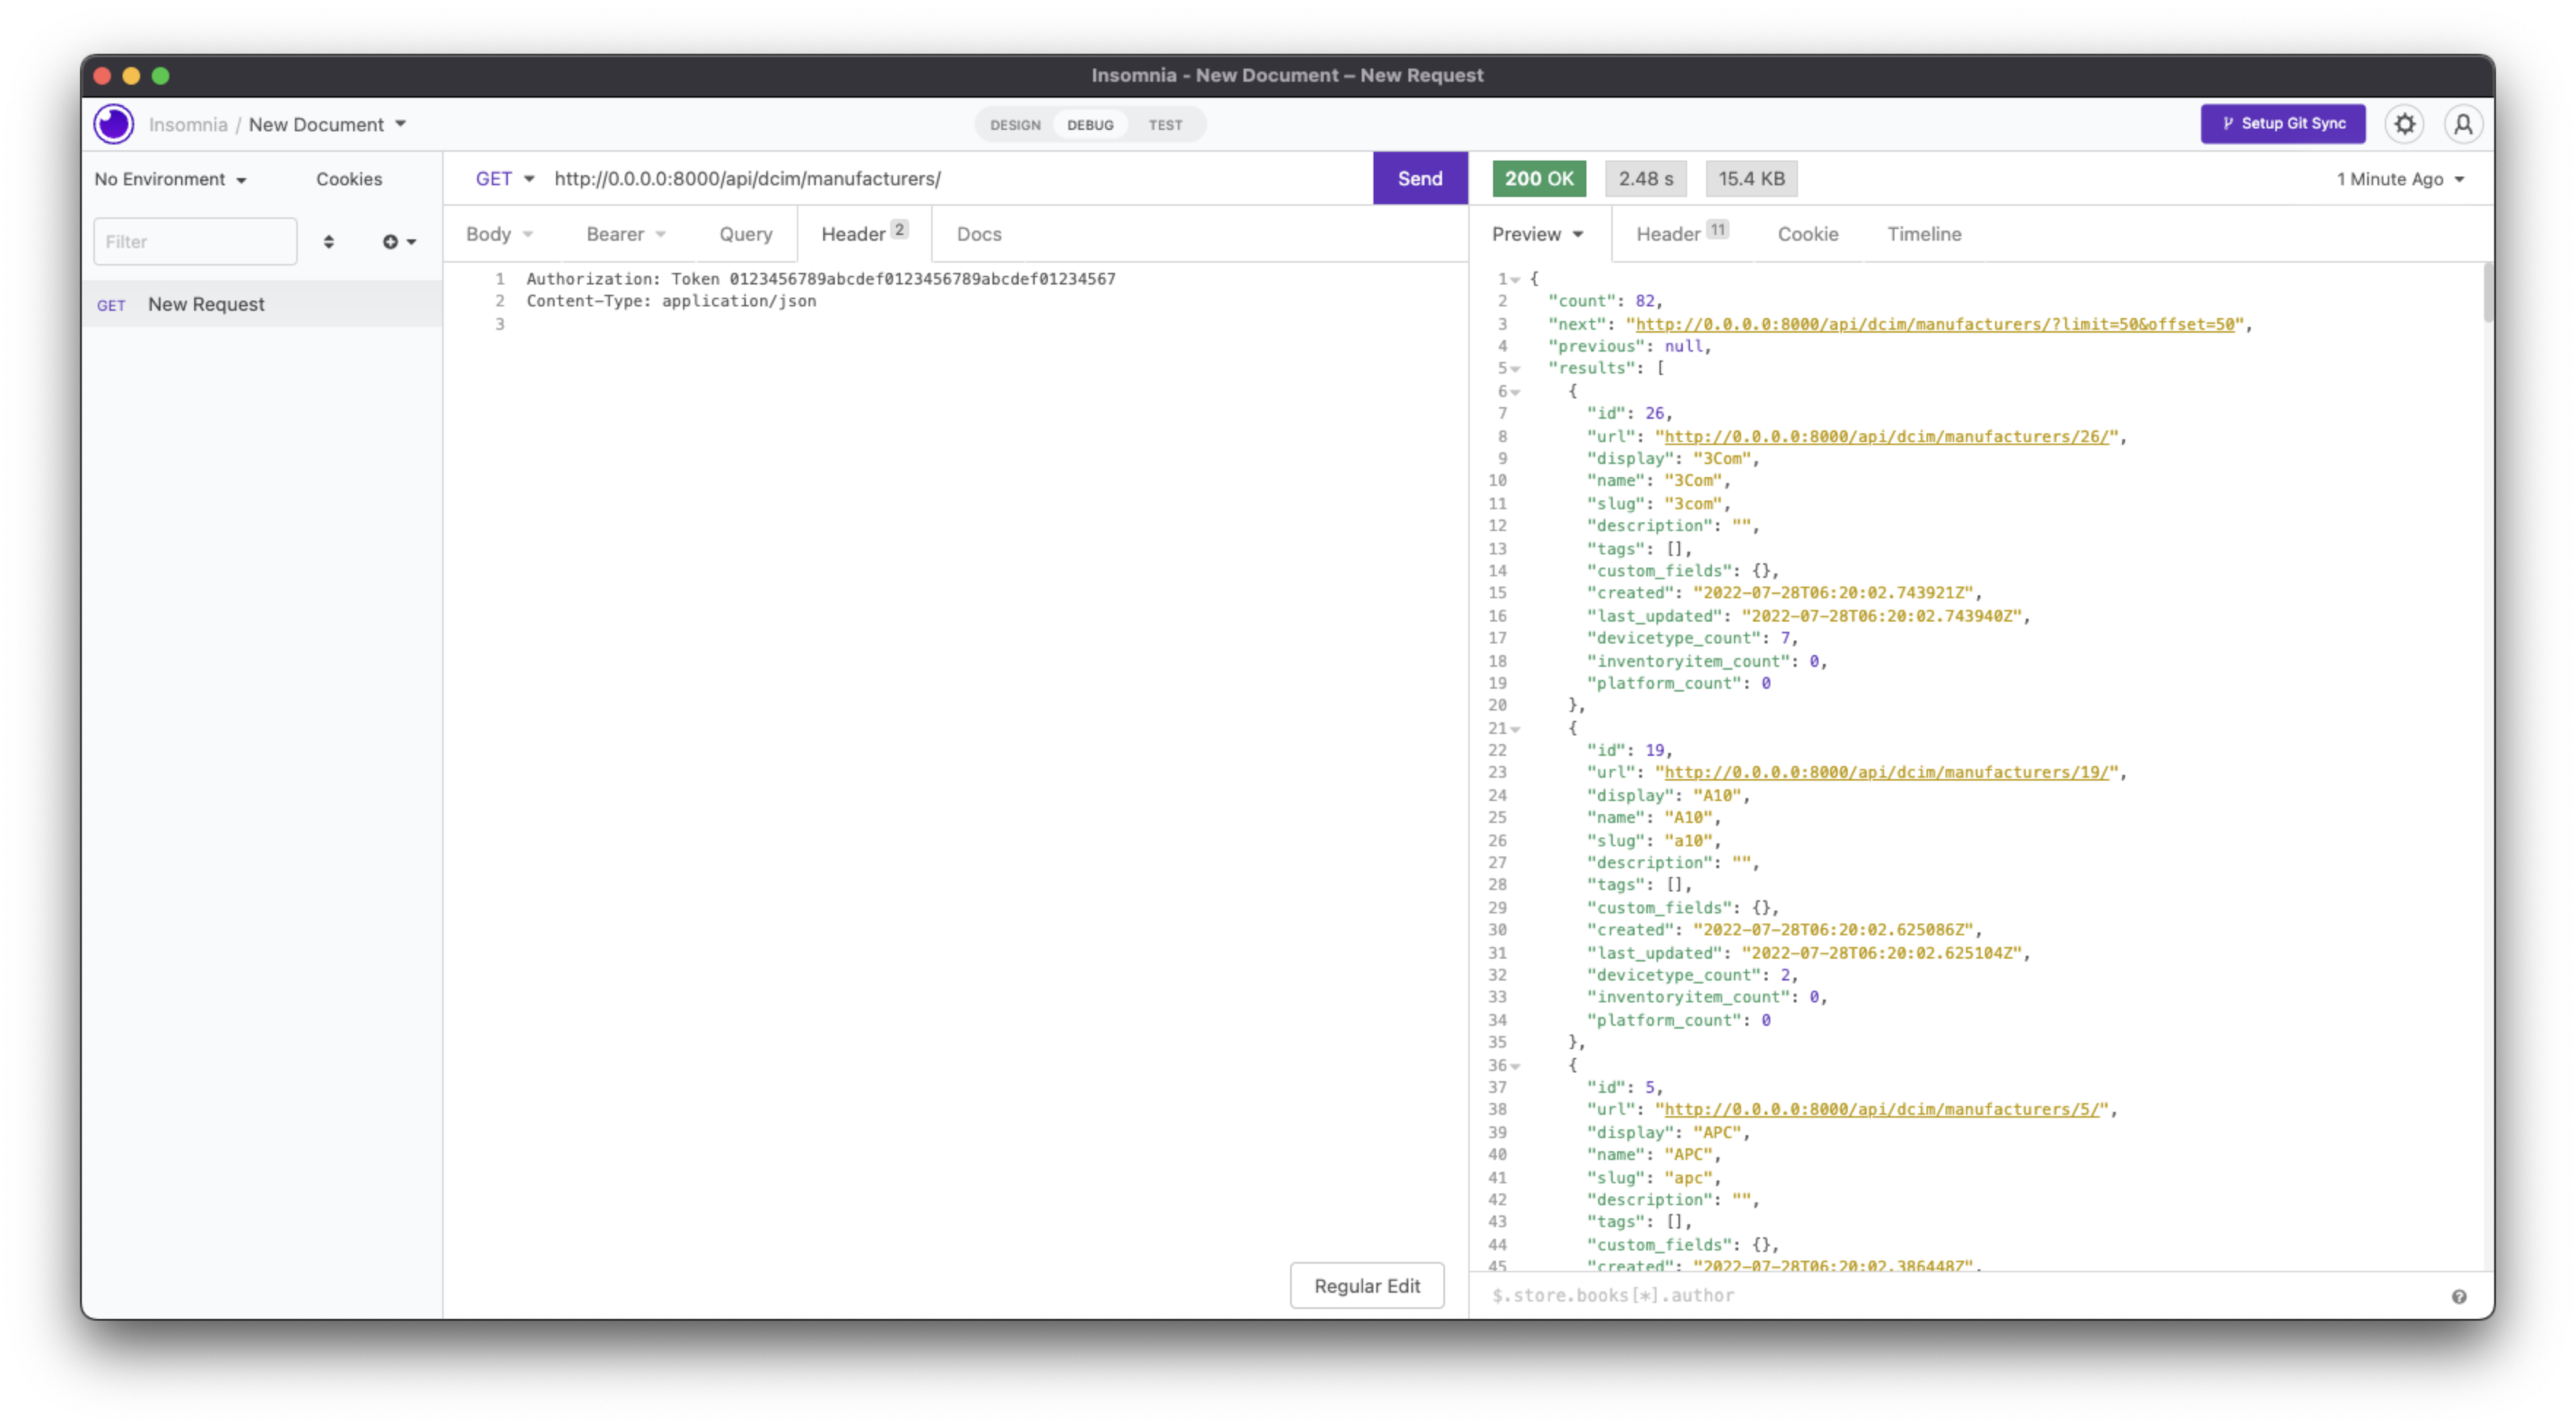
Time for a practical example, let’s try to gather the current manufacturers (vendors) existing in our Netbox instance.
Generally, the process would be as follows:
Find the path required for what we’re trying to do3, for this example ‘manufacturers’:
Open the GET entry and explore the parameters required - for this particular query there is no mandatory parameter
required (they’re marked with a red asterisk).
Open your API client of choice, I’m going to use Insomnia.
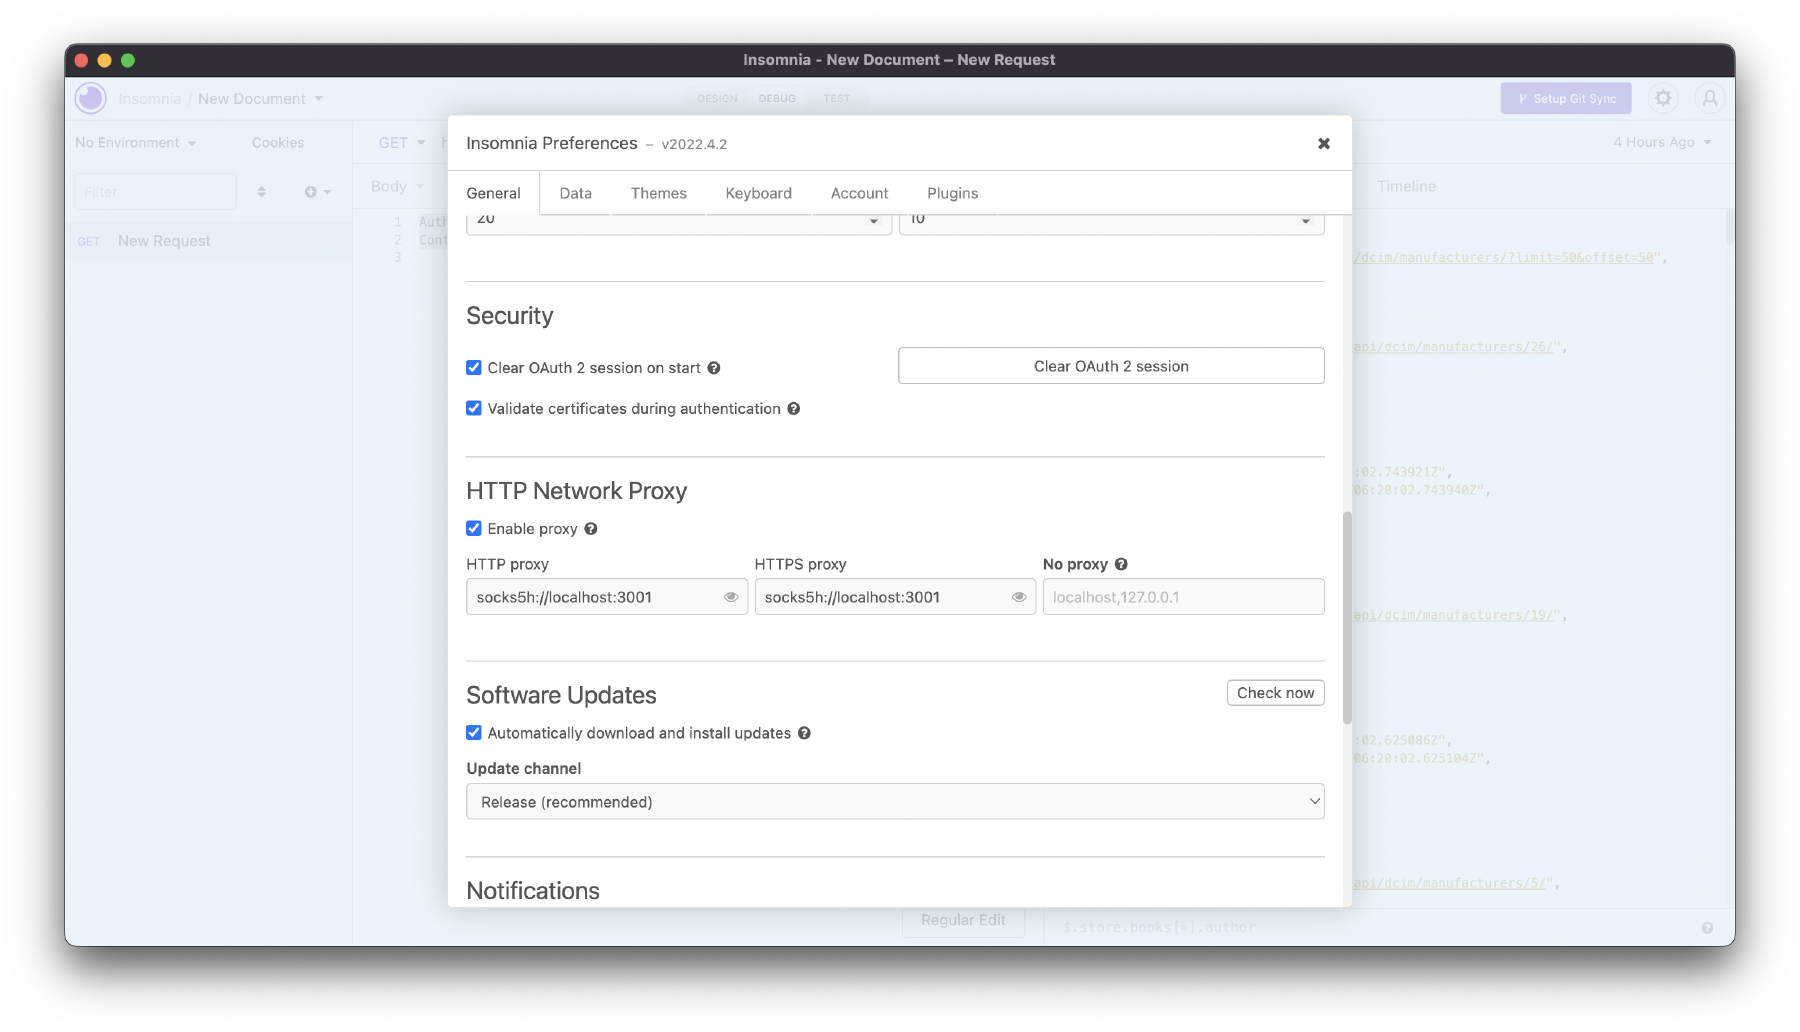
As before, If you’re running this container on a remote server you’d need to add the following config to Insomnia,
in addition to the same SSH command as before.
If you can access Netbox without needing a proxy, remove the “–proxy socks5h://localhost:3001” argument.
API calls using Python
API clients such as Insomnia or Postman and CLI programs like cURL are handy tools when trying to learn how the Netbox
API is structured or how Netbox presents the data in response to different API calls. However, if we want to work with
that data to extract useful information, take various actions based on that data and so on, we need to go a step further
and use a programming language, here I’m going to use Python with the
Requests
library.
First, let’s try the same example as above but this time, making the request more specific: manufacturers whose name is “Fortinet”.
importrequestsfrompprintimportpprintheaders={'Authorization':'Token 0123456789abcdef0123456789abcdef01234567','Content-Type':'application/json',}netbox_api_url='http://0.0.0.0:8000/api'full_url=netbox_api_url+'/dcim/manufacturers/'payload={'name':'Fortinet'}r=requests.get(full_url,headers=headers,params=payload)# .json () provides the API's response in JSON format ; .txt in clear textpprint(r.json())
Here’s the magic about using Python, the Netbox API response to our API call is a Python dictionary, which means we can
very easily extract whatever information we want and do whatever we want with it.
Conclusion
We’ve just scratched the surface of the power of the Netbox API, in the future I’m planning to go in much more depth by
exploring how to create and rack devices, prefixes, VLANs, and much more!
The key areas to keep in mind when making API calls are:
Finding the specific path required for whatever data we’re trying to get: see the (
API documentation
)
Finding the parameters required for the specific query, sometimes you’d want to use parameters to filter the output (for example,
you want to find a specific device filtering on its name as opposed to asking Netbox to give you all devices), other times
the query in question will force you to provide those parameters (for example, in creating a device, you must provide its name,
device_type, device_role,..) - again all this info is in the API documentation.
The type of HTTP method to use - this depends on what you’re trying to do (GET for getting info, DELETE for deleting
it, POST for adding it, and so on).
If you understand the above, you can make full use of the Netbox API. Then you’d need a bit of Python knowledge to know
how to extract the data from the dictionaries and make use of it.
I’ve changed the original syntax to use the new “Compose V2” syntax (“docker compose” instead of “docker-compose” - see
https://docs.docker.com/compose/
for details. I have also added “sudo” for running the docker commands. And finally,
added the “-d” option to the last command so that it runs in the background. ↩︎
I’ve modified the script so that it uses “docker compose” as opposed to “docker-compose”. For now, you can still
use docker-compose, however, keep in mind that it’s discontinued now. ↩︎
‘control + f’ for searching in the browser should do the trick. ↩︎
You can copy this URL in your browser and will give you the same output - this is handy for a quick test to make
sure you got the right URL for the API call. ↩︎